Hello Excellers time for some more #macromonday fun. If you use Microsoft Excel, then you know that organiSing your data is a critical part of the spreadsheet process. And one of the most efficient ways to organise you Excel workbook is by sorting it alphabetically or numerically. So, in this blog post, we’ll show you how to sort your Excel worksheets by number. It is a quick and easy process helping to streamline your data-management tasks. I will walk you through creating a reusable Excel macro to get the job done. So read on for instructions and lets get started. Stay tuned for more helpful Excel macros.
My scenario I am sharing to day is 600+ worksheets numbered 1 to 660 auto-generated by another system. So the extracted worksheets did not come out in numerical order. I needed to sort them quickly and did not want that manual task on my hands. Who has time for that?
What Does The Macro Do?
This macro iterates through each sheet in your Excel workbook and sorts them numerically. How does Excel do this?. It compares the current worksheet number to the previous worksheet. If the last number worksheet is greater numerically than the current worksheet, it moves the sheet in front of it. Excel works its way through worksheets until completed and sorted. Phew, no more manually sorting those worksheets.
Step 1. Starting The Excel Macro.
First, you will need to open the Visual Basic Editor. There are two ways to do this. Either by hitting ALT +F11 or selecting the Developer Tab | Code Group | Visual Basic. Both methods have the same result.
When you decide to write an Excel macro, you need to choose where to store it. You have two choices.
- Store it in the current Excel workbook you are working on creating.
- Save the macro in your Personal Macro workbook.
So, what is the difference? It is simple. If your code is specific to that workbook, then store it within the workbook. If you can reuse a type of macro, keep it in your Personal Macro Workbook. I could reuse this macro repeatedly to remove personal information in this example. I, therefore, will save it in my Personal Macro workbook.
Type the name of your macro. In this example, I call my macro SortWorksheetsByNumber. As soon as the macro name is typed into the VBA editor, Excel automatically inserts the End Sub line of code. Write all other lines of code between the name of the macro and the End Sub line of code.
Step 2. Declaring Variables
So, if variables need to be declared, now is the time to do it. Excel creates a memory container for each variable. In this macro, we declare two variables. They are below.
Dim CurrentSheetIndex As Integer 'the current sheet iteration
Dim PreviousSheetindex As Integer 'the previous sheet iteration
Step 3. Use The For Loop
Next, the For step is executed first. This step allows you to initialize any loop control variables and increment the step counter variable. In this case, Excel starts iteration counting for both variables. The PreviousSheetIndex is set to 1 behind the CurrentSheetIndex.
For CurrentSheetIndex = 1 To Sheets.Count
For PreviousSheetIndex = 1 To Sheets.Count - 1
Step 4. Sorting Excel Sheets Numerically.
This line of code uses Val to get both sheet names to ensure that they are sorted numerically. Only if the Previous Sheet name is greater than the Current Sheet name is the Current Sheet moved to a position before the Previous Sheet.
If Val(Sheets(PreviousSheetIndex).Name) > Val(Sheets(CurrentSheetIndex).Name) Then
Sheets(CurrentSheetIndex).Move before:=Sheets(PreviousSheetIndex)
End If
Step 5. Looping Continues
The Loop begins again, and every iterations increases the increments of both variables by 1 number until the last worksheet is reached. Subsequently, the macro ends when all iterations have been carried out.
Next PreviousSheetIndex
Next CurrentSheetIndex
Step 6. Ending The Macro
Finally, for this macro it ends once all iteration are completed. The End Sub code already exists from the first step of naming the macro. Now all there is left to do is test the macro!
That is it. Easy, and tonne of time saved as you can imagine with 600+ worksheets to sort. A really easy way to sort Excel worksheets.
So, we hope you’ve found this blog post informative and interesting. Did you find out anything new that could help your Excel skills? If so, we want to hear from you! Leave a comment below with what surprised or interested you the most in today’s post. In addition, if there is any other information about sorting by number in Excel worksheets that we left out but would be helpful for our readers, please let us know as well!
Do You Want To Copy The Code On Full To Use To Sort Your Excel Worksheets?
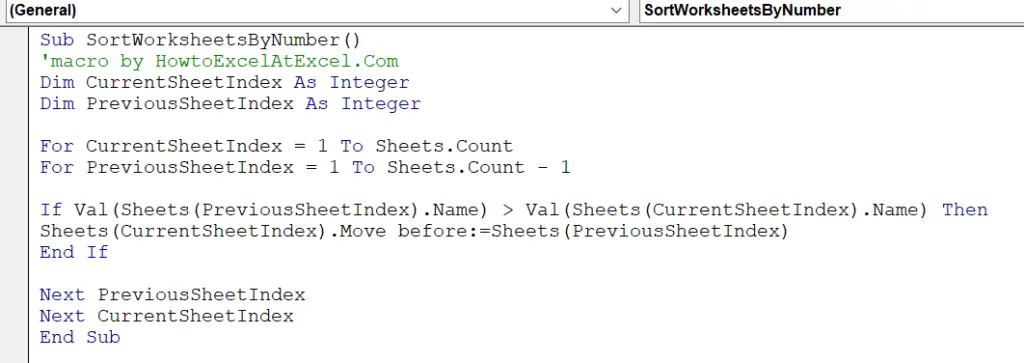
Sub SortWorksheetsByNumber()
'macro by HowtoExcelAtExcel.Com
Dim CurrentSheetIndex As Integer
Dim PreviousSheetIndex As Integer

For CurrentSheetIndex = 1 To Sheets.Count
For PreviousSheetIndex = 1 To Sheets.Count - 1

If Val(Sheets(PreviousSheetIndex).Name) > Val(Sheets(CurrentSheetIndex).Name) Then
Sheets(CurrentSheetIndex).Move before:=Sheets(PreviousSheetIndex)
End If

Next PreviousSheetIndex
Next CurrentSheetIndex
End Sub
Click on this page right here to read all blog posts in the #MacroMonday series. Feel free to read my currated page of #FormulaFriday blog posts right here.
Finally, for MORE Excel and VBA tips, sign up to my monthly Newsletter, where I share three Excel tips each month and receive my free Ebook, 50 Excel Tips, as soon as you sign up. No Spam.


