Hi, Excellers. Welcome back to another blog post in my new year of 2021 #MacroMonday Excel series. Today let’s take a look at how to enable macros and also disable Macros in Excel. Unfortunately, it is a reality that not all Excel workbooks that contain macros are safe to open. So, as a consequence, you have the choice to enable macros in Excel or disable them. Alternatively, they can be stores in a trusted location on your machine.
Table Of Contents.
With the release of Excel 2010, the security model changed significantly to previous versions. It introduced the concept of ‘Trusted Documents’. A trusted document is deemed safe to open and enables its macros.
When an Excel workbook that contains macros opens, Excel will display a warning. A yellow bar across the top of the document under the ribbon warns the user that the Excel workbook includes macros. For security purposes, macros are disabled.

Once the user selects ‘Enable Content’, the document becomes ‘trusted’. As long as the Excel workbook opens on the same computer, there will be no prompt to enable the content again for that Excel workbook.
What Are Trusted Locations?.
If you do not want to enable the content of specific Excel workbooks individually, then use ‘Trusted Locations’. A Trusted Location is a folder or safe zone where only trusted documents are stored. Subsequently, Excel workbooks that contain macros stored in that location will run without the yellow warning appearing and no security restrictions applied to the files..
Instructions On How To Set Up A Trusted Location.
It is easy to set up a trusted location on your machine. To begin with, click on the Developer Tab. If you do not see the Developer Tab, then you probably need to enable it. Follow the steps below or click on my quick video on Enabling the Developer Tab.
- File Tab | Options
- Customize | Ribbon option in the left-hand window to view the available options in the right-hand window of the dialogue box.
- Under the Main Tabs section of the Options window, check off the Developer option.
- Click Ok to see the Developer Tab.
Back to setting up the trusted location!.
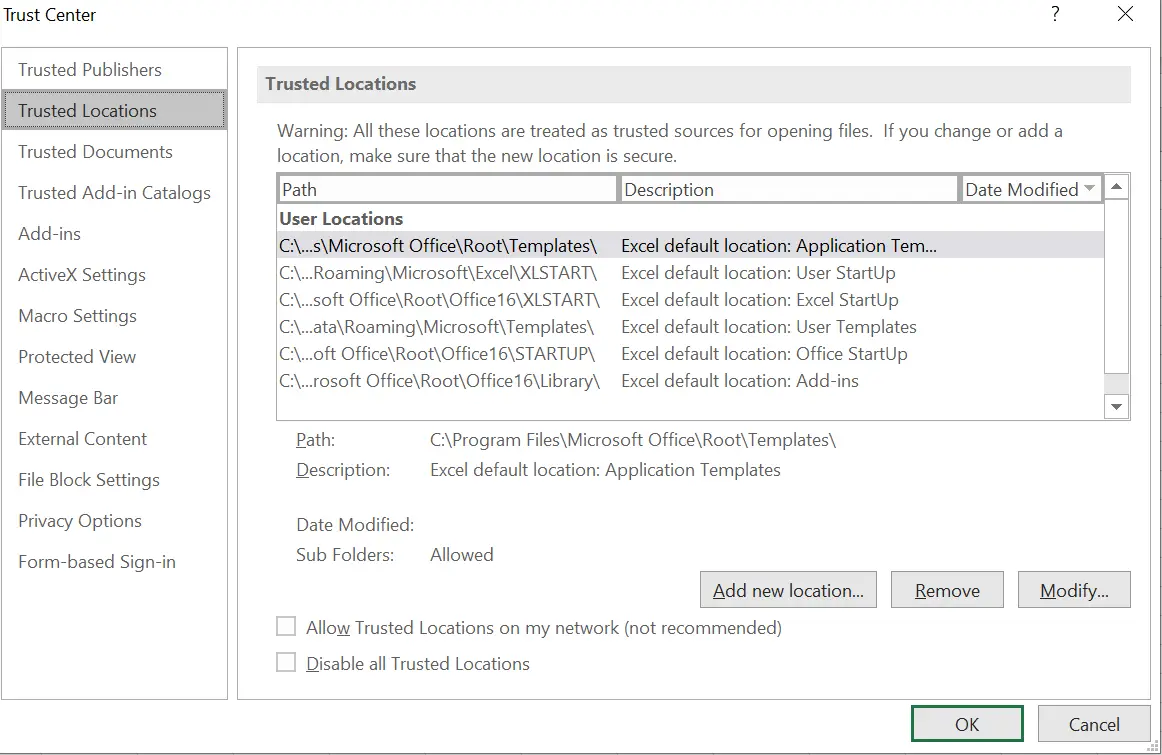
- Select Macro Security on the Developer Tab to enable the Trust Center Dialog Box
- Click the Trusted Locations option, which opens the Trusted Locations menu.
- Hit Add New Location.
- Choose a location to be the folder where you store your trusted documents. That’s it.

So, Excel will not display the warning whenever an Excel document opens from the locations or folder you created. Essentially, Macros will be automatically enabled.
Other Ways Explaining How To Enable or Disable A Macro In Excel.
So, here are more ways to enable or disable macros.
Using the Backstage View.
You can enable macros in a file is via the Microsoft Office Backstage view. The view appears after you click the File tab when the yellow Message Bar we discussed above appears.
- Click the File tab.
- In the Security Warning area, click Enable Content.
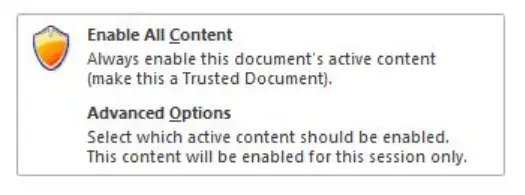
- Under Enable All Content, click Always enable this document’s active content.
- Now, this file becomes a trusted document, which we already have discussed in the section above.

Enable Macros For One Time Access In excel.
There is an option to enable macros for just the session that that Excel workbook is open. (Upon Enabling the content when the yellow warning appears) . When the file is closed then reopened Excel will prompt the user with the yellow security warning again. This is a one time access only option.
- File Tab | In Security Warning | Enable Content
- Advanced Options
- Microsoft Office Security Options
- Enable Content for this session for each macro
- Hit Ok
Any setting in the Trust centre will override any of the other options already discussed. These settings become the new default macro setting and will apply globally to all of your Excel files. So, if you need to enable any macros for specific workbooks, then I suggest you save them in a trusted location (already discussed above).
Access the settings by following the steps below.
- In Excel, File Tab | Options
- Select Trust Centre | Trust Centre Settings
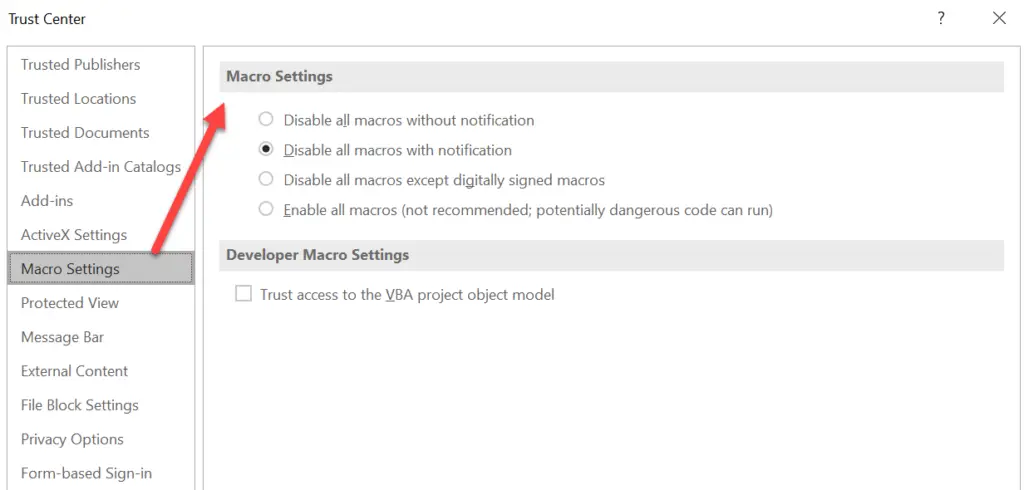
- Macro Settings

Next, there are a series of options. Below is an explanation of what each option means.
Macro Settings Explained.
Disable all macros without notification. This option will disable all macros, and none will be able to be run. Excel will give no warnings to the user. Only macros stored in a trusted location will run.
Disable all macros with notification. It is the default setting in Excel. All macros are disabled but can be enabled on a case by cases basis.
Disable all macros except digitally signed macros. Essentially the same as the setting above, except that if a trusted publisher digitally signs the macro, the macro can run. (only if you have already trusted the publisher). If you have not trusted the publisher, a notification is displayed. So, you can choose to enable those signed macros or trust the publisher. All unsigned macros are disabled without notice.
Enable all macros. Any macros and code are allowed to run freely, even those with malicious intent. Avoid this setting.
Trust access to the VBA project object model. Now, this setting controls programmatic access to the object model of VBA. Disabled by default, it prevents unauthorized programs from changing your macros or building self-replicating harmful codes.
Final Notes On Macro Settings.
Finally, these settings relate only to Excel and not to other Office programs.

