Want to create your own style Excel work book to re use over and over again? It is easy to create your own default template in Excel to fit in with your corporate style or your own personal style.
When you create or open a new work book in Excel, you are presented with Excel’s default standard version. You may not like that style. You may prefer to have just one worksheet, a different font or background color, or indeed a standard corporate heading that is on all of your spreadsheets.
If you want to stay away from the default, Excel is very flexible and gives you a lot of options to make your workbooks your own. It is easy to create a new default work book, all you need to do is create a new custom template, save the file as book.xltx and save the file to it’s correct location on your hard drive.
Let’s start customizing a new blank work book. Here are a list of some of the main items you can change to customize your template.
- Number Of Sheets– You can add extra sheets or delete sheets. I like to default my work books to one sheet. You can also change the names. Use Office>Excel Options>Popular Tab and select your options.
- Graphics– You can insert a logo, or any graphical file or files you want to. Really make it your own
- Print Settings– Use Page Layout to specify printing related items such as header and footers as well as margins.
- Column Widths– If you do not like the default settings then just change them.
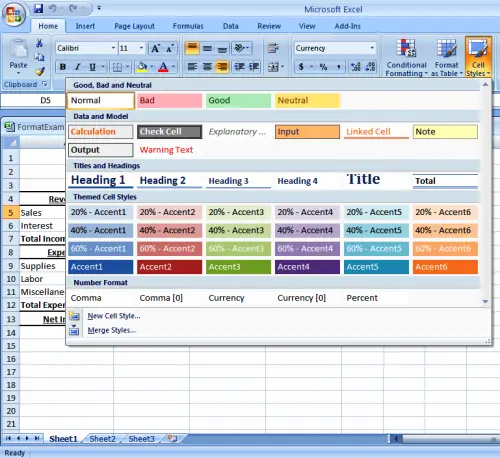
- Styles- you can use the extensive style gallery in excel to help customize your own style. By default all cells use the ‘Normal’ style so if you want to change the default font in any way including the borders, number formats, or color then amend the Normal style. If you want to change the style completely then right click the name in the Style gallery and hit Modify then make the changes.

Once you have chosen your new settings you need to set your new work book up as your default. This is straightforward:-
Office>Save As>Select Template ( *.xltx) or (*.xltm) if your work book has any macros.
Name the file book.xltx (or.xltx if contains macros) and make sure the file is saved to your XLStart folder. Excel states it should be saved in your Templates folder but ensure it is saved in your XLStart folder. ******
After you save the file, close it. From now on when you start Excel your new blank default work book will be the one you have just created.
Should you need to create a work book with the original default work book then hit Office>New and select Blank Work book.
You can really make the default template your own, add a company logo and colors without any extra effort, by creating a new default template you can work smarter and faster but keep that professional edge.
**** depending on your version of Office your XLStart folder could be in a few places.
If you are using XP the the folder will probably be located in one of the following directories:-
C:\Documents and Settings\ <username>\Application Data\Microsoft\Excel\XLStart
C:\Program Files\Microsoft Office\Office12\XLStart
If it’s Windows Vista you are using then try:-
C:\Users\<<username>AppData\Roaming\Microsoft\Excel\XLStart
Other Excel Templates and Tips you Might Like
1. Yes Please I Want More Templates!
2. Create A Customer Theme In Excel