Hello, Excellers. Welcome to another Excel Tips post in my 2021 series. In this blog post, I will share with you how to quickly remove blanks or spaces from your data set. This super quick method in Excel is great for data tidy up. The Paste Special function is used.
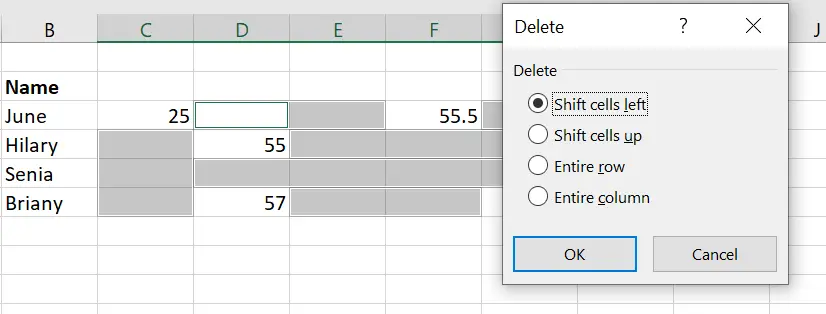
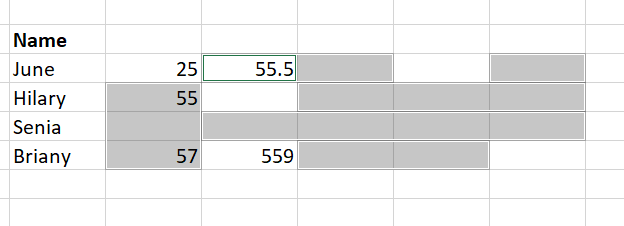
So, let’s get some data tidy up done. Here is a sample data set to use. Some blanks still remain from a previous data tidy up step. These probably have been left from a previous step in the process of data tidy up.

It is really straightforward to remove those blanks with the steps below:
- Select the range of cells you want to remove the blanks from. In my example it is C3:G6.
- Home Tab | Editing Group | Paste Special (or shortcut ALT+E S).
- Select Blank and hit Ok. All of the blank cells will be selected.
- Right Click on any of the blank cells and hit Delete
- Finally, in The Delete Dialog Box confirm you want to Shift cells left.

So, hit Ok the blanks will be gone. Your data are aligned and tidy. This is a super quick way to help your data tidy up.

So, paste special is an underrated function in Excel. (In my opinion of course!). To learn more about this special function feel free to read my blog post below. I walk you through sixteen. Yes, that is correct sixteen uses of Paste Special. Including of course remove blanks.
So, if you want more Excel and VBA tips then sign up for my Monthly Newsletter. I share 3 Tips on the first Wednesday of the month. You will receive my free Ebook.