Macro Monday time and that means some more Excel macros and VBA. Today let’s look at a tiny Macro that pulls a punch. Are you a Microsoft Excel user who stares in frustration at your workbook, wishing there was an easier way to unlock all of its cells at once? We have the perfect solution for you! Visual Basic for Applications (VBA) makes it possible to quickly unlock every cell in your workbook with just a few short lines of code. Read on and learn this simple trick so that you can save time and directly access whatever information is hiding inside the locked cells!
Example Use Of This Excel Macro.
I used this Macro myself last week whilst creating a spreadsheet solution for a colleague. The problem posed was I needed to unlock all of the cells in all of the worksheets (14 in total!) in a workbook, so I could then go onto lock and protect a set of cells in all of the worksheets. I need a quicker way to unlock all of those cell on all of those worksheets. Here is the solution.
What Does The Macro Do?
This Macro will unlock all cells in each worksheet in an Excel workbook.
How Does The Macro Work?
The Macro uses the Worksheet.Cells property in Excel. This property returns a range object that represents all the cells on the worksheet. This is a great way to set the status of all of those cells to unlocked. So let’s get coding and unlock all cells in the Excel workbook.
Step 1. Visual Basic, Insert A New Module,Name The Macro.
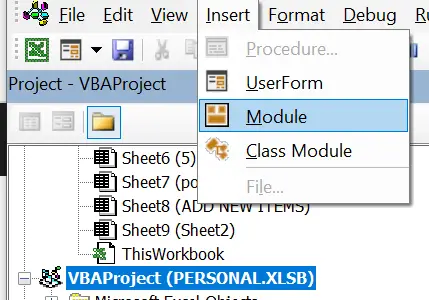
The first step as always is to open Visual Basic in Excel. There are two ways to do this. You can either Hit ALT +F11 or Developer Tab – Visual Basic – Insert Module. So,i f you do not see the Developer Tab, it may need to be enabled in your Excel application. Read my corresponding blog post here to find out how to enable the developer tab.
To start the macro writing process to unlock cells in Excel. Insert a new module into wither your Personal Macro Workbook or the current workbook. Select the current workbook as the location if the macro is only to be used in that specific Excel workbook. To re-use the code in any workbook then choose Personal Macro Workbook as the location. As a result, macros saved in the Personal Macro workbook can be access when the Excel application is open.
In this example I name my macro UnlockMyCells.
Step 2. Declare Variables.
The next step is the place any variables are declared. In this macro I declare one variable. This will create a memory container in Excel for each worksheet the macro loops through. The variable is
Dim ws As Worksheet
Step 3. Loop Through All Worksheets.
Excel loops through all worksheets in in the Excel workbook. Active.Workbook is used to restrict the code running only on the current active worksheet in use. Makes sense right?. The loop works though each individual worksheets, runs the code in Step 4. Excel then continues the loop in Step 5.
Step 4. Cell Status To Unlocked.
This next line of code switches the status of the cells to unlocked and sits in between the beginning of the loop and end of the loop.
With ws.Cells.Locked = False
End With
Step 5. Ending The Loop.
The next ws line of code loops back to Step 3 and Step 4 of line of code. This is the last stage of the Excel macro. Finally, once all Excel worksheets are looped and the cells unlocked, the macro ends with the End Subline of code. Excel automatically enters this line of code once the macro is named at the beginning of the process.
Copy The Code.
Here is the cull VBA code if you want to try this
Sub UnlockMyCells()
Dim ws As Worksheet
For Each ws In ActiveWorkbook.Worksheets
With ws
.Cells.Locked = False
End With
Next ws
End Sub


