Up next in 10

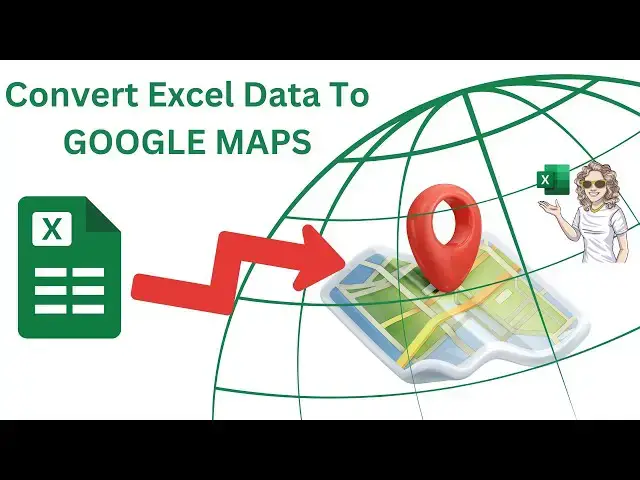
In this Excel tutorial I show you how to import data from Excel into Google Maps. By using address data in Excel, you can easily create your own Google Maps. I walk you through adding data, then explore available options to edit your data points.
After this, you learn how to add more data into your map. There are two ways to do this. Finally, I show you how to share your map privately with friends or restrict access to yourself only. There is also an option to embed the map on your website.
I hope you enjoy this longer video tutorial and learn some new cool Excel skills.
My Excel Playlist is below.
Excel Tips Playlist
• Excel Tips
Subscribe and watch more videos that help you use Microsoft Excel.
/ @howtoexcelatexcel
Be Social & Let's Connect
++Website http://www.howtoexcelatexcel.com
++Twitter / howtoexcelatex
00:00 Introduction
Show More Show Less View Video Transcript
0:01
hi everyone my name is Barbara welcome
0:02
back to my YouTube channel thanks for
0:04
joining me again today I'm going to show
0:06
you how to import data from Excel into
0:09
Google Maps and create your very own
0:11
location map in Google maps you can then
0:16
share this with other people you can
0:18
publish it publicly or you can then
0:21
embed it on your own website even so
0:24
let's get started so the first thing
0:26
that we need to do is have a data set
0:28
that we can import into Google Maps to
0:30
create our location map so you're going
0:33
to import it into Google Maps so you
0:36
need to know where it's stored for
0:37
example mine I know is stored on my
0:41
desktop in the postal data folder and
0:45
I've called it air codes Air codes are
0:47
the equivalent in Ireland of zip code in
0:50
America and postcodes in the UK all the
0:54
data has to be on one spreadsheet where
0:56
my example is on sheet one it can only
0:59
be on one sheet to import it into Google
1:02
Maps Okay so the first thing we need to
1:05
do is go to my maps in Google Maps so
1:10
what you can do is you can search for
1:11
Google my maps or my maps Google Maps um
1:15
and it is and it's this URL that you
1:18
need to go to I'll leave a link in the
1:21
description box below so you can click
1:23
on that and get straight to Google my
1:25
maps so if you have any maps that are
1:28
already created they will be here I've
1:30
got no Maps here at all and the only
1:32
thing that I can do is take a tour or
1:35
create a new map and that's what I
1:37
wanted you so click on create a new map
1:40
hit
1:42
create and the first thing we need to do
1:44
is import some data so click import and
1:49
it prompts you to choose a file to will
1:51
import so I'm going to browse for mine
1:54
CU I know it's on my desktop but you
1:56
could also bring some in from Google
1:58
Drive or any albums you have app so I'm
2:00
just going to browse to my
2:02
desktop um and in my postal data file
2:06
I'll select air codes and hit open
2:09
Google Maps will go away and we'll start
2:11
to import that data into the background
2:15
so so the first thing we need to do is
2:17
select a column that tells Google Maps
2:20
where to put Place marks on the map such
2:24
as an address longitude latitude or in
2:26
this case I'm going to I've got air Cod
2:28
so I can select that
2:30
that's good enough to pinpoint the
2:33
location hit
2:35
continue and we can also use at this
2:37
point uh a title for the plac mark such
2:40
as the name location or person I'm going
2:42
to leave that as air codes for now and
2:44
I'll talk you through how to change that
2:46
just in a bit so if I hit finish I then
2:50
have my four this is a really small data
2:53
set four locations brought into the map
2:57
so you can see that this map is quite
2:58
busy if I just scroll out you can see
3:01
that I've got four locations which
3:03
happens to be dentists in Cork so if
3:06
that doesn't suit how you want the
3:09
visual to be you can actually change the
3:11
base map you might want satellite or
3:14
some of the other options I think I'm
3:16
going to use this one that looks quite
3:18
good for what I'm doing so that's how to
3:21
basically import a data set in and we've
3:24
selected air code to pinpoint the
3:28
location
3:30
of our data points here now we have our
3:32
data points imported in let's take a
3:36
look at the options we have so the
3:38
default usually is grouping the places
3:40
by uniform style which just means that
3:43
they have the same look as data points
3:45
which is in this case a blue
3:49
marker what we can do is we can group
3:52
them by a sequence of numbers H which is
3:56
is alpha numeric currently by the air
3:59
code if we wanted to set different
4:01
labels um we chose if you remember to
4:05
bring the labels in as our codes but if
4:07
we wanted to actually name the dental
4:10
practices we could actually then name
4:13
them now this is really hard to see on
4:16
this so let's just take another look at
4:17
the base map and we might just want to
4:20
change that let's have a look at this
4:22
one that looks a lot better we can see
4:24
those a lot better on our map it's
4:27
always a good idea just to play around
4:29
with the base map that's best for
4:30
yourself depending on your needs um for
4:33
the map so we've got those labeled so
4:36
we've got those the labeled with the
4:38
name currently still set as sequence of
4:41
numbers we also have individual Styles
4:44
and this is where we can click in and
4:48
you can see this is the information here
4:50
that was brought in from our data set
4:52
the additional information we actually
4:53
have is the longitude and latitude which
4:57
is useful a lot of people use use
4:59
longitude and
5:01
latitude in their data set and if we
5:04
just move along uh we can go to style
5:07
here and we could change the color uh
5:10
individually of these placeholders if we
5:12
wanted to we then can edit the data
5:16
directly in we can also add a
5:19
photograph if we want to we could embed
5:21
an image there that might be useful if
5:23
you're putting this data on your website
5:25
you can also add in directions or you
5:27
can actually delete the record
5:30
so you can
5:31
individually edit each of these data
5:34
points in
5:37
turn let's go back to Shannon dental and
5:39
let's see what options what we can do is
5:41
actually we can change the icon here so
5:45
uh there's a few icons
5:47
available let's look up tooth oh there
5:51
we
5:51
go this might enhance your map a bit we
5:55
can actually put a tooth H as it is a
5:57
dental practice again that might be
6:00
useful if you want to make your map
6:02
embedded on your website a little more
6:05
interesting I'll show you how to embed
6:07
that later on in the video if you want
6:10
to individually go in and you can see
6:14
what data is available so if we had even
6:16
more data fields then they'd appear here
6:20
so the next feature of Google Maps is
6:22
well what if I want to add more data in
6:25
or I want to delete a record well
6:27
there's two ways that you can add data
6:29
records in and they're really really
6:31
different so the first so they're really
6:33
really different and they have very
6:35
different results so the first is to
6:37
manually add some data into the data set
6:40
and this adds it to the maps but it
6:42
doesn't sync it down to your data set if
6:44
you remember we went in and we imported
6:47
this from my desktop if you change the
6:49
data directly in the map it does not
6:52
sync back down to your data set so if
6:54
you manage the data on your local
6:56
machine then you might want to CH to to
6:59
use the second option that I'm going to
7:03
show you but if you wanted to if you
7:06
wanted to add the data if you wanted to
7:08
add some more data what you do is use
7:10
these layer options and open the data
7:13
table and this is our data set that we
7:16
imported in now this is a really small
7:19
data set you could have hundreds on
7:21
there you just add a rowle and then you
7:23
can manually type in the
7:26
data as I say this will not sync back
7:29
down to your data set if you wanted to
7:31
add another layer in if you manage it
7:33
locally what you need to do is just
7:36
import
7:37
another layer in so I've got one more
7:42
that I have so I've got um another one
7:47
record uh in my postal data set so let's
7:51
just open that
7:53
up and again I just
7:56
select air Cod to position my
8:04
data so I've now brought in this record
8:08
here I now can say well give me the name
8:12
it's bishopstown dental
8:14
clinic and actually I want to give that
8:18
a tooth icon like the other one so
8:21
that's now added in my extra record so
8:25
that's how to add some more data into
8:26
your data set let's move on to sharing
8:30
your map so you might want to just have
8:33
this map for personal reasons you might
8:36
have a road trip planned or you might
8:38
want to embed it on your personal
8:40
website if you want to share that
8:42
publicly you hit the share
8:45
button and what you want to do is
8:48
[Music]
8:49
just uh label it so I'm going to
8:53
say so I'm going to label it
8:57
dentists in C
9:00
you can put a description and hit
9:03
okay so there's a few options here to
9:06
share your map you can
9:09
um you can restrict it to anybody where
9:13
so this is the actual link to your
9:15
Google Map so you've got a few options
9:18
for this you can share it with anybody
9:21
who you give the link to or you can
9:24
actually make it public and let other
9:27
other people search for it and find find
9:29
this map on the
9:31
internet bear in
9:33
mind anybody who has access will see
9:36
your name and profile if you have a
9:38
picture on my maps and drive so it's up
9:42
to yourself if you want to restrict it
9:45
to those who you give the link to it
9:49
might be other people that have gone on
9:50
your road trip family
9:53
friends just select anyone with this
9:56
link and view if you're happy enough for
9:58
it to go on the internet and if somebody
10:00
searches for on Google Maps for dentists
10:03
in Cork your map will pop up it's up to
10:08
yourself so basically you can share it
10:11
or you can give them the link and this
10:13
is also the link that you can embed on
10:16
your
10:18
website if you choose to do so
10:31
so that's it that's how to import data
10:34
from Excel into Google Maps what we've
10:36
covered is styling our map choosing a
10:40
different type of map individually
10:43
editing our data points on the map
10:45
adding more data in bearing in mind if
10:48
you add it in manually it doesn't sync
10:51
back to your data set if you've got it
10:53
saved locally like mine was I had to
10:56
import one more into the Google map to
10:59
add data and then we discussed sharing
11:03
your map with people who had the link or
11:05
you can make it public and let others
11:07
search for the map on the Internet it's
11:09
entirely up to yourself This is the link
11:12
to your map that you've created I hope
11:14
you enjoyed this Excel tutorial if you
11:16
did please consider subscribing it's
11:19
free really easy to do and takes a
11:21
couple of seconds I'll leave a link in
11:23
the description to my other playlists I
11:25
have over 140 Excel tutorials there for
11:28
you to brows I'm sure you'll find
11:30
something of use hit the like button it
11:34
really does help the channel and hit the
11:37
notification Bell and you'll get
11:38
notified when I upload another Excel
11:42
video thanks for watching
#Science